Get started in three steps
Get your documentation site running locally and make your first customization.Step 1: Click on Add-Server

Step 2: Fill out information of your server.
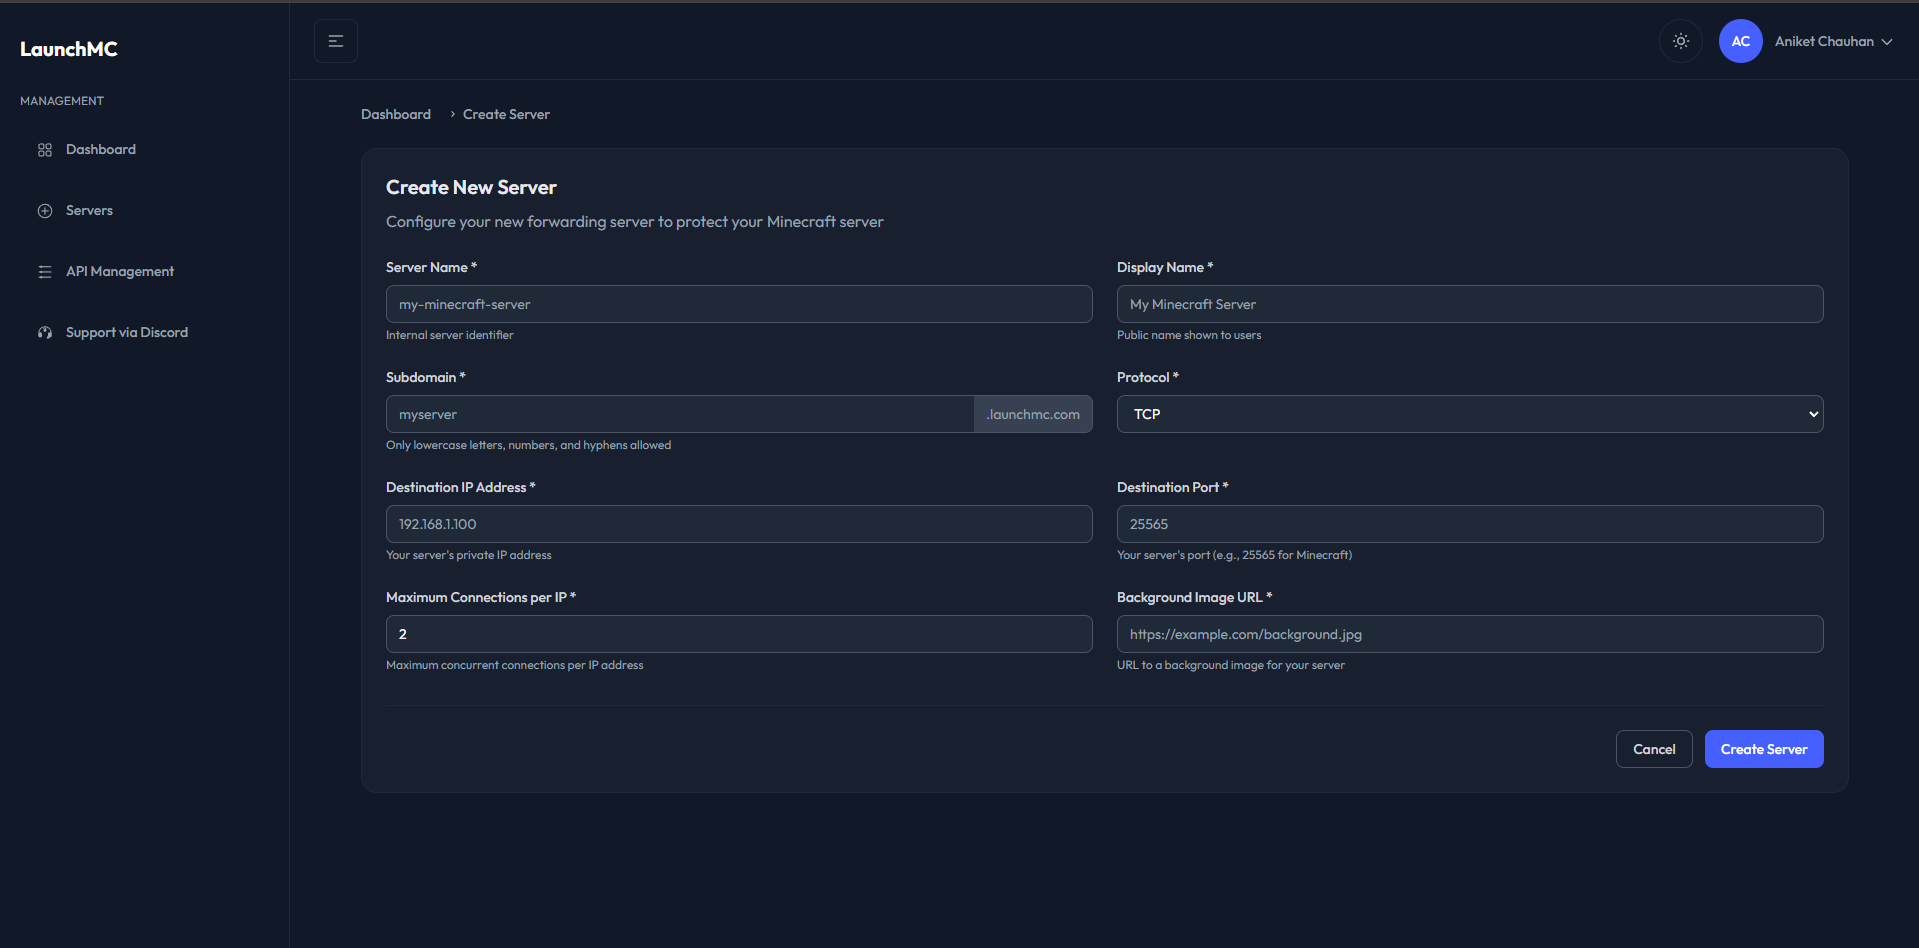
Information about fields
Information about fields
- Server Name -> Server Name is a local name for a server on your dashboard this is a just an identifier.
- Display Name -> Display Name is the public name of your minecraft server. This is shown everywhere and on the connection page.
- Subdomain -> Select your favourite subdomain for your players to visit the connection page for the connection information.
- Protocol -> Select the protocol of your server. Currently TCP is only available.
- Destination IP -> Your origin IP where your minecraft server is hosted.
- Destination Port -> Your origin port where your minecraft server is hosted.
- Maximum Connection Per IP -> Maximum connection a IP can have to your server. 2 is more than enough for most game servers, If your server requires more than 2 connections simultaneously feel free to increase it.
- Background Image URL -> URL for the background image on the connection page. Refer to Player Flow.
We recommend using common minecraft ports like 25565 or in range of 25560 -> 25570.
Step 3: All set to go!
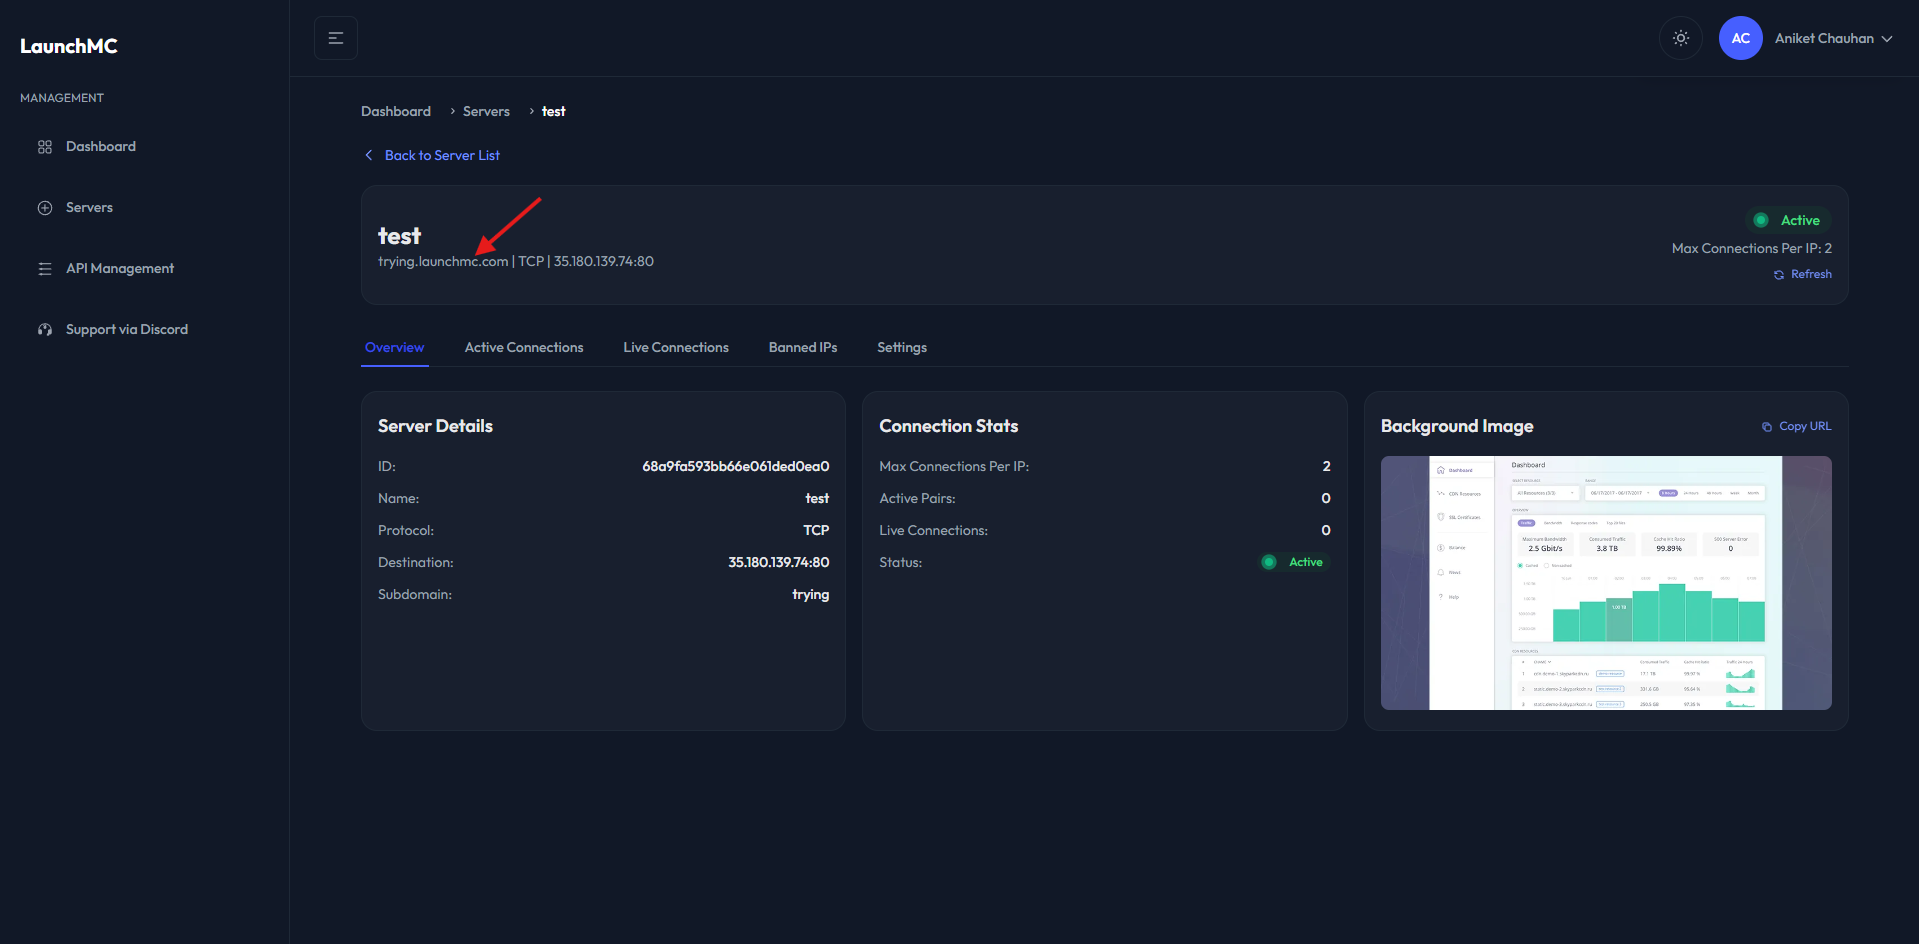
Connect to your server.
Connect to your server.
Now as in the screenshot above, you can find your custom subdomain, which you can visit to get the connection details of the server.
Need help? Join our discord for support.